Getting Started
Getting Started
Welcome to the ydata Portal! This guide will walk you through the first crucial step: connecting the portal to your Netbox instance.
The connection method depends on how you are accessing the service. The portal can operate in two modes: a full-featured, authenticated Portal or a streamlined, standalone Devicesheet tool.
Portal
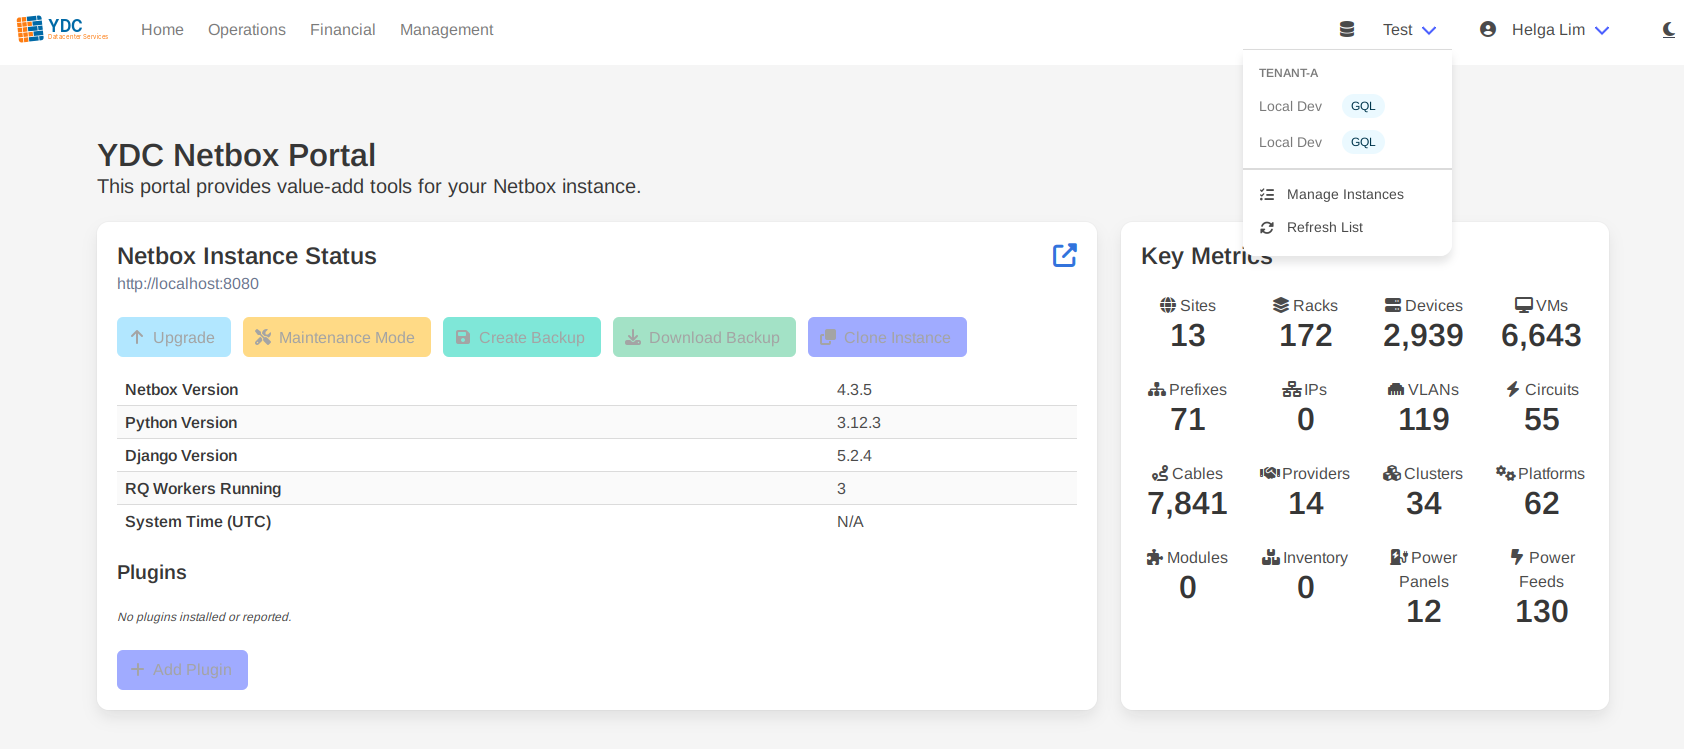
If your organization uses the full portal with Single Sign-On (SSO), your administrator has already configured the available Netbox instances for you. Your job is simply to select the one you want to work with.
-
Locate the Instance Selector: In the top-right of the navigation bar, you will see a dropdown menu. It will either say “Select Instance” or show the name of the last instance you used.
-
Choose an Instance: Click the dropdown to see a list of Netbox instances you are authorized to access. These are often grouped by tenant or customer. Simply click on an instance name from the list.
-
Ready to Go: The portal is now connected. The dropdown will update to show the currently active instance, and all tools (like the Devicesheet, Changelog, etc.) will now pull data from it.
Tip: You can switch between different Netbox instances at any time by using this dropdown menu. To add a personal instance or manage existing ones, click “Manage Instances” within the same dropdown.
Devicesheet (Free version)
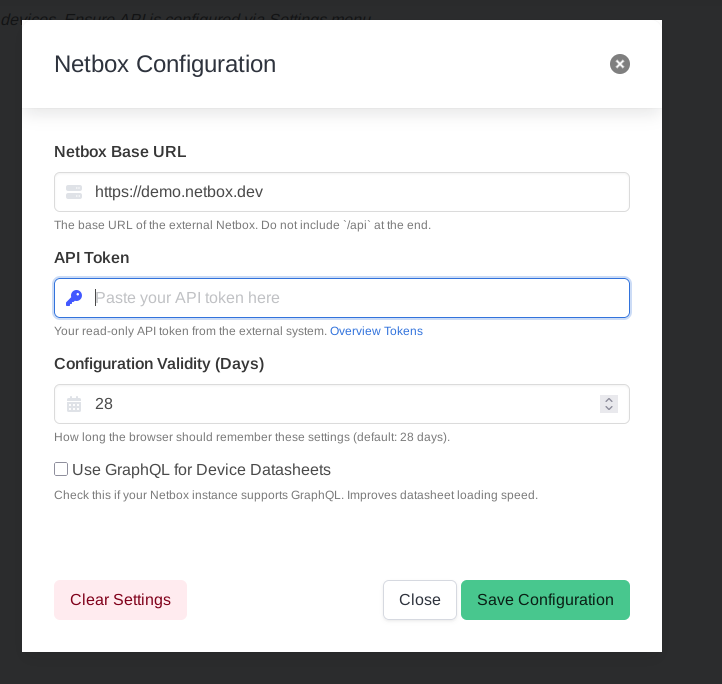
If you are using the standalone devicesheet application, you will configure your Netbox connection manually. This information is stored securely in your browser’s cookies and is never saved on the portal’s server.
-
Open Settings: In the top-right of the navigation bar, click on Settings. This will open the “Netbox Configuration” modal.

-
Enter Your Netbox URL: In the “Netbox Base URL” field, enter the full URL of your Netbox instance (e.g.,
https://netbox.yourcompany.com). Do not include/apiat the end. - Enter Your API Token:
- In a separate tab, log in to your Netbox instance.
- Click on your username in the top right and navigate to Profile -> API Tokens.
- Create a new read-only token for the portal to use.
- Copy the generated token and paste it into the “API Token” field in the portal’s settings modal.
-
Enable GraphQL (Recommended): If your Netbox instance has GraphQL enabled, check the Use GraphQL for Device Datasheets box. This will make the datasheet feature significantly faster.
-
Save Configuration: Click the Save Configuration button. The modal will close. A small status indicator will appear in the top-right corner of the page, showing the name of your connected instance.
You are now connected and ready to use the Devicesheet tool!